
Five Useful Tips to Increase Your Performance With LEADING Media & proDigi
Do you actually know the functions of all the icons in the LEADING Media menu? Some of the buttons are truly multi-talented! Today we present five functions that will help you to do your work as a media planner in general and as a new user of proDigi in particular faster, easier and more efficiently!

Curious? Then sign up now for a free trial month and see for yourself the advantages proDigi offers!
![]()
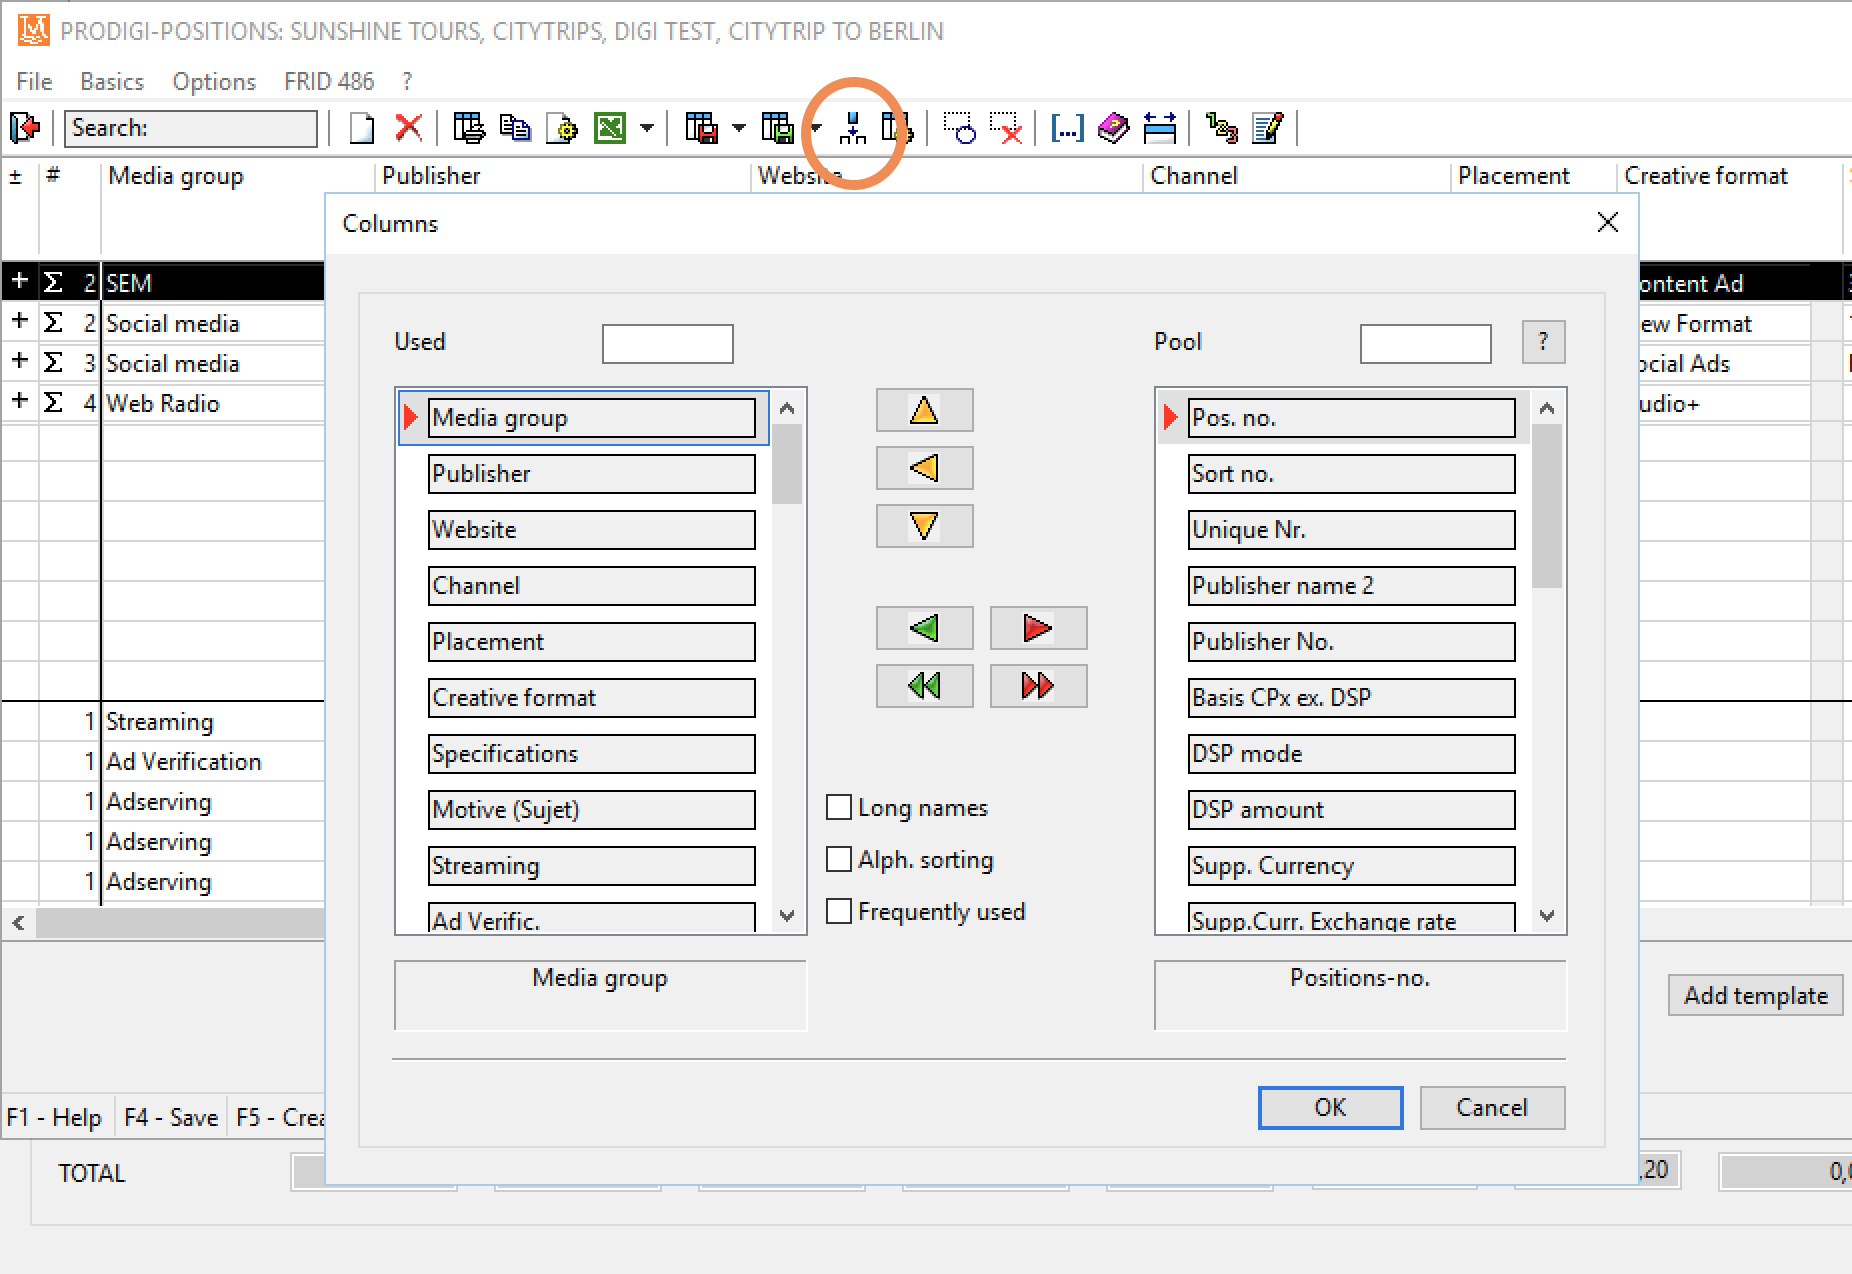
Pro tip # 1: Manage Columns
You want to determine which columns are displayed where? The "Manage columns" function allows you to tailor the display of your data.
Click on the "Manage columns" icon in the menu or select this option by right-clicking on the header of a column. A window opens. On the left you will see the columns already selected, while on the right all available options are displayed. New columns can be moved into the displayed area with the green arrow, while the red arrow removes them again. The double arrows allow you to select or remove all columns at once. The yellow arrows allow you to select a specific location in the grid. Alternatively, you can use the drag & drop function.
Pro tip #2: Search & Filter
You are probably already familiar with this function from your work with LEADING Media. The search and filter function allows you to quickly find specific information.
To do this, right-click on the column you want to search. Select the option "Search in column...". Type your search term on the keyboard and proDigi jumps to the first line with a hit in the position list. If you then click into the search field in the menu, the entered search term becomes the filter in this column.

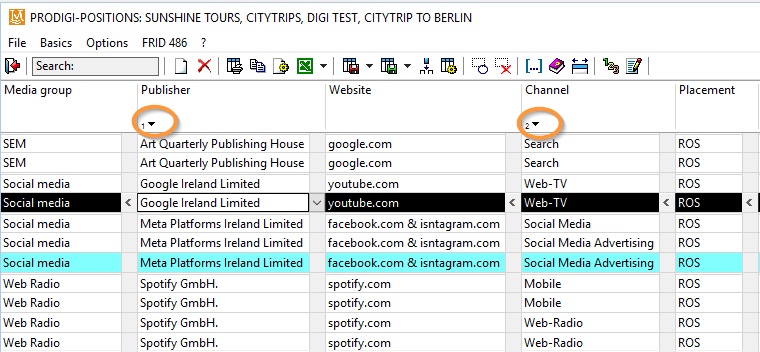
Pro tip #3: Sort
The "Sort" function allows you to better organise and structure your information, which in turn makes it easier to analyse and access relevant data.
Right-click on the column header and select 'Sort by...' to activate this function. You can sort by different criteria, for example, first by Publisher and then by Channel. The arrow symbol in the column header indicates that sorting is done by this column. The number next to the arrow symbol indicates the order in which the entire list is sorted.
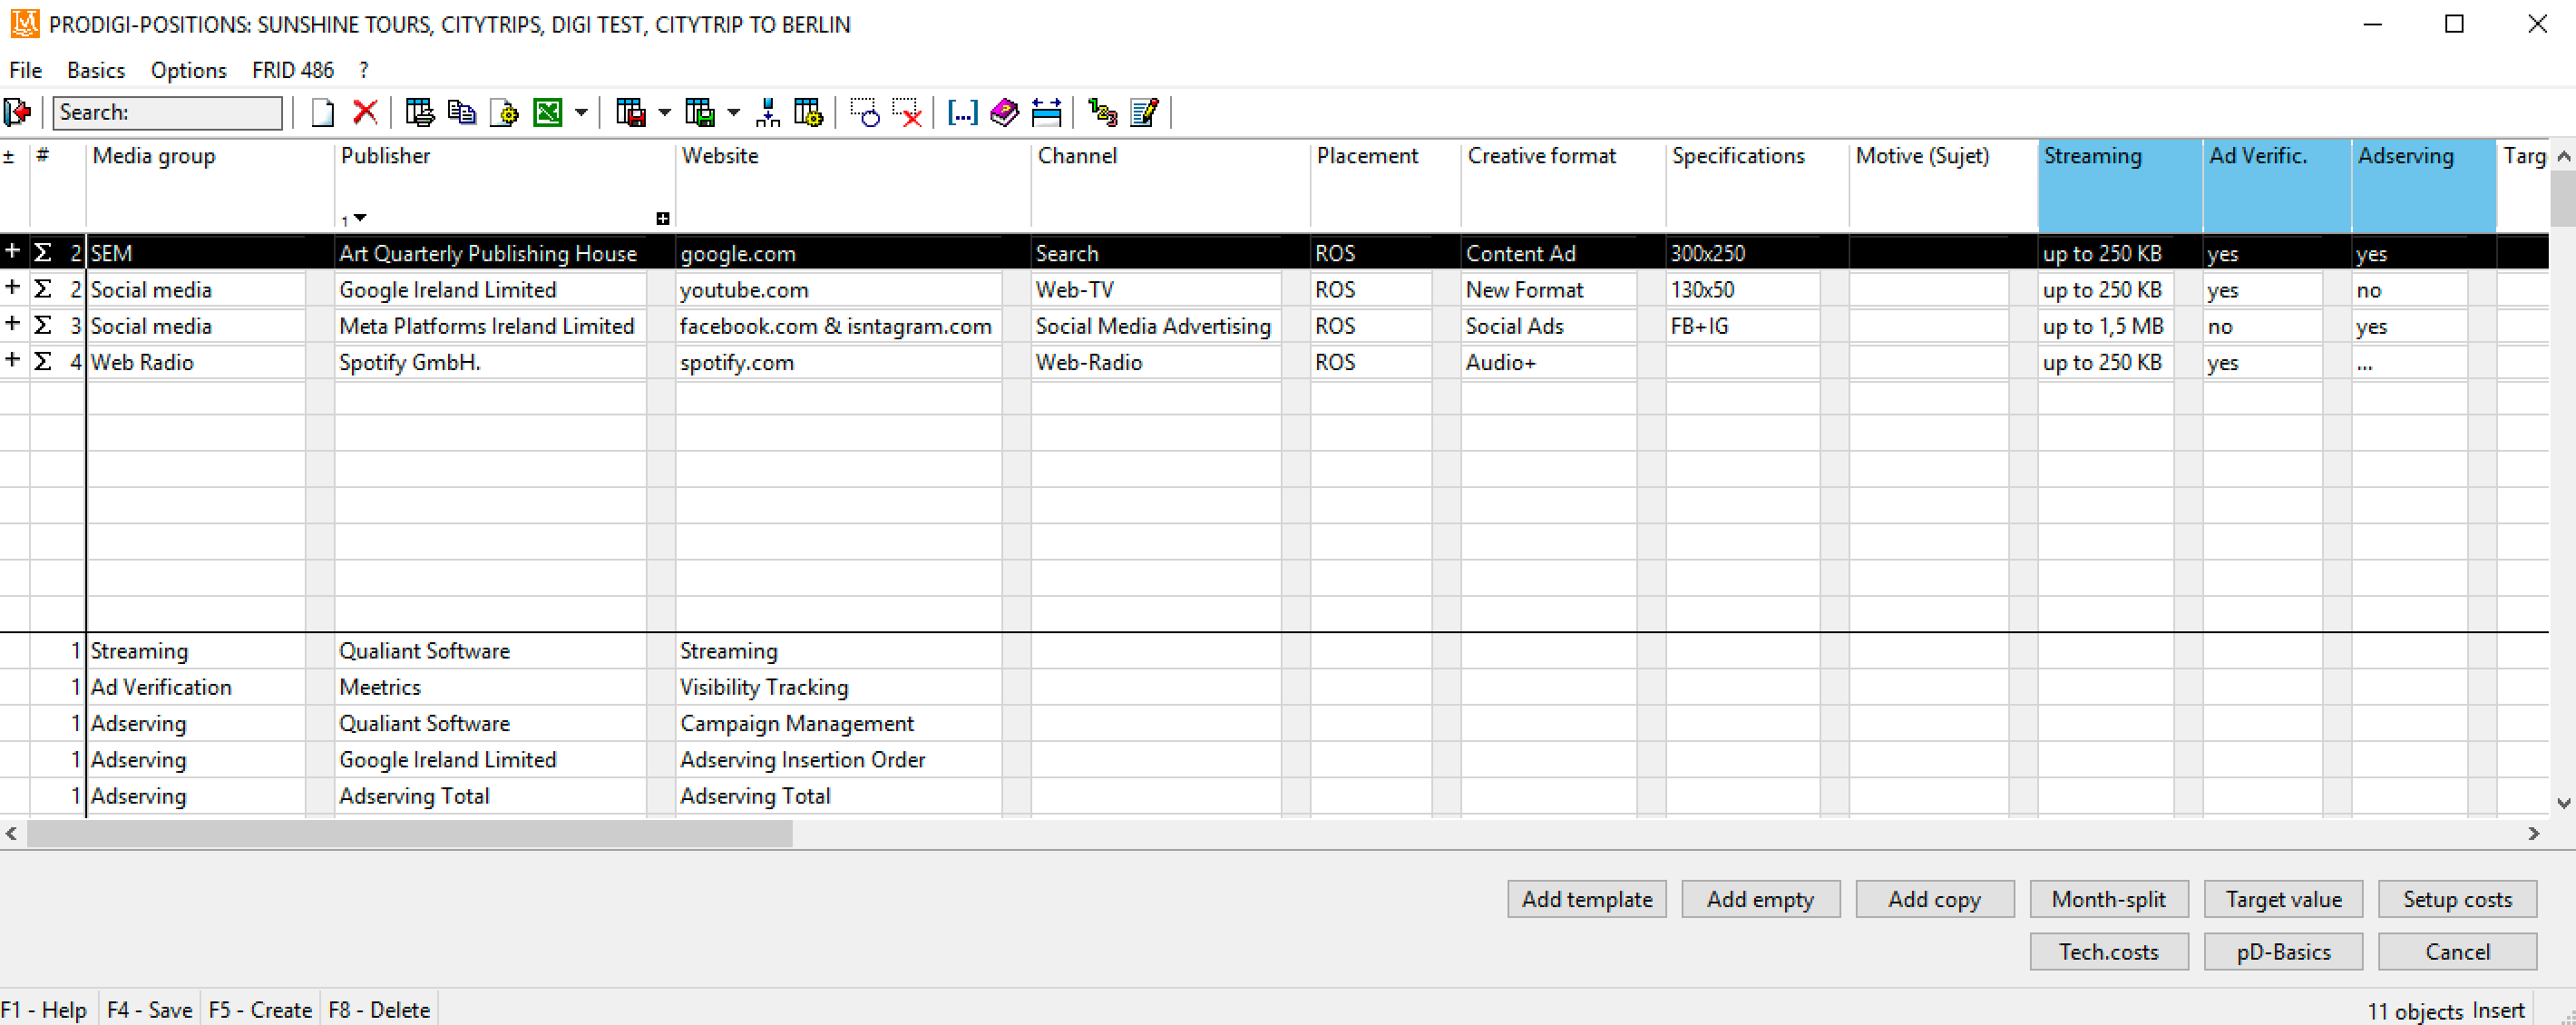
Pro tip #4: Condense
The " Condense" function makes it easier to summarise and analyse large amounts of data, especially if you need specific groupings or aggregated information.
Select the option "condense by..." with a right mouse click, in our example "by publisher". As a result, you get a sum row per publisher. You can select which values are to be calculated when condensing. The default values are totals, but you can also display the minimum, the maximum or the average, or hide the value altogether.
By expanding the contained rows by clicking on the plus sign on the far left, you can view all detailed information again if required.
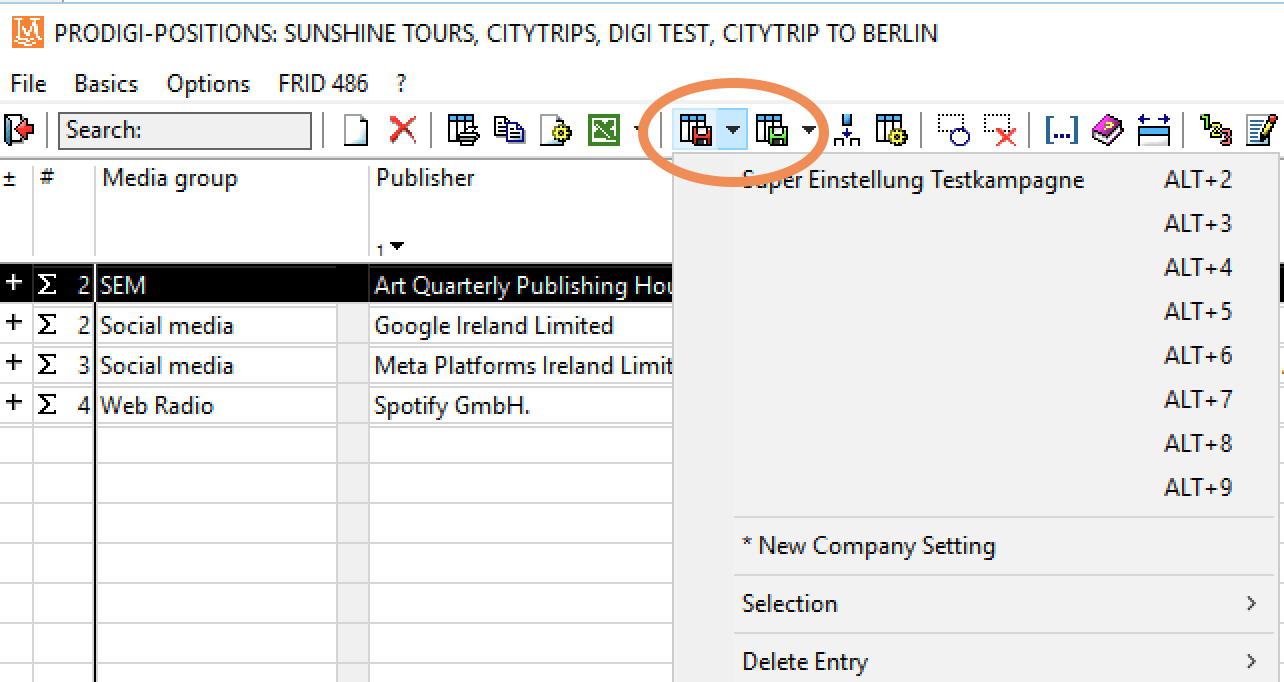
Pro tip #5: Save Settings
If you have now optimally set up the view of the position list, you can also save these settings. To do so, click on the table symbol with the red disk. Up to 8 memory locations are available for individual settings. You can give each setting a name when you save it or rename it afterwards. You can call up the saved settings via the icon with the green disk.
We hope that these professional tips will save you a lot of work in the future and make your job more stress-free.
Video Tutorial
For detailed instructions on how to use the Search, Filter, Sort, Summarise and Manage Columns functions, please watch this video:
In the next proDigi blog post, we will show you how to use the versatile export functions to create orders, media plans, production plans and ad server briefings in just a few clicks and how to export your data for invoicing and performance measurement.
Register now for free trial
Does that sound interesting to you? Then sign up for a free trial month without obligation.